Tips, projects, ideas...

  • 8 Steps to Hosting a Crafter's Workshop


    Have you been looking for a fun and creative way to boost your business? Hosting a crafting workshop is a great way for people to get to know what you and your business are about, and gives them a unique & fun opportunity to connect with you personally. Here are some ways that hosting a craft workshop can benefit you and your business:

    1. Build your reputation: Hosting a workshop can build your reputation of being a skilled crafter who’s down to earth and appreciates their customers. It gives your attendees a chance to interact with you directly which can lead to loyal, returning customers.

    2. Generate income: Hosting a workshop can be a great way to make money, while also having fun. It is also a great way to connect with other crafters in your community, and possibly gaining new business contacts.

    3. Building your community: Hosting a recurring workshop can lead to creating your own small community. It’s a great way to bring other people together and create an atmosphere of belonging and creativity that they get through your business.

    4. It encourages personal growth: Leading and hosting a workshop is a great way to exercise your leadership and people skills. It can help you build confidence in yourself when it comes to taking control of your business and how you relate to the public. It also gives you great insight into what your customers like and look forward to regarding your business.

    Here are the main things to do when planning your workshop:

    1. Determine your audience: Decide what kind of craft you would like to do and who the target audience for that craft is 

    2. Choose a location: Consider the amount of attendees you expect, the type of craft you will be doing and what amenities you’d need to successfully lead the workshop, and what materials everyone would need.

    3. Create a detained plan: Keep yourself as organized as possible. Develop a list of materials and tools that are needed, as well as a schedule and straight forward lesson that is easy to follow for the skill level of your audience. 

    4. Advertise your workshop: Social media is a great way to promote your workshop for free. You can also advertise with online community boards. 

    5. Prepare the space: Make sure you set up the space before your attendees ae there. Have materials and individual workspaces set up ahead of time to keep you and your attendees organized. It’s also smart to have a few extra craft kits for emergencies.

    6. Create a welcoming environment: Greet your attendees as they arrive, and make sure they feel comfortable and welcomed into your workshop. 

    7. Leading the workshop: While actively leading the workshop, make sure that you are explaining things clearly, giving your attendees time to complete each step, and be there for any questions or help that is needed. Try to create a casual and comfortable environment while also being able to lead and assist. Keep your attendees engaged by encouraging them to ask questions and share their own experiences and feedback. 

    8. Wrap up and stay in touch: At the end of your workshop, thank your attendees for coming and save yourself time to interact with them personally before they leave. It’s smart to have feedback sheets for your attendees to fill out anonymously so that you can improve future workshops and see what worked. Try to get your attendees emails so you can communicate any further workshops or news about your business.


    Hosting a crafting workshop is a fun and unique way to bring people together and associate something fun with your business. Don’t be afraid to get creative and be the leader, all while having some fun. With the right planning and preparation, your workshop is sure to give your attendees unique insight into what makes your business so special!
  • Beginner's Guide to Creating your own Earring Cards on Canva

  • Creating a Business Vision Board

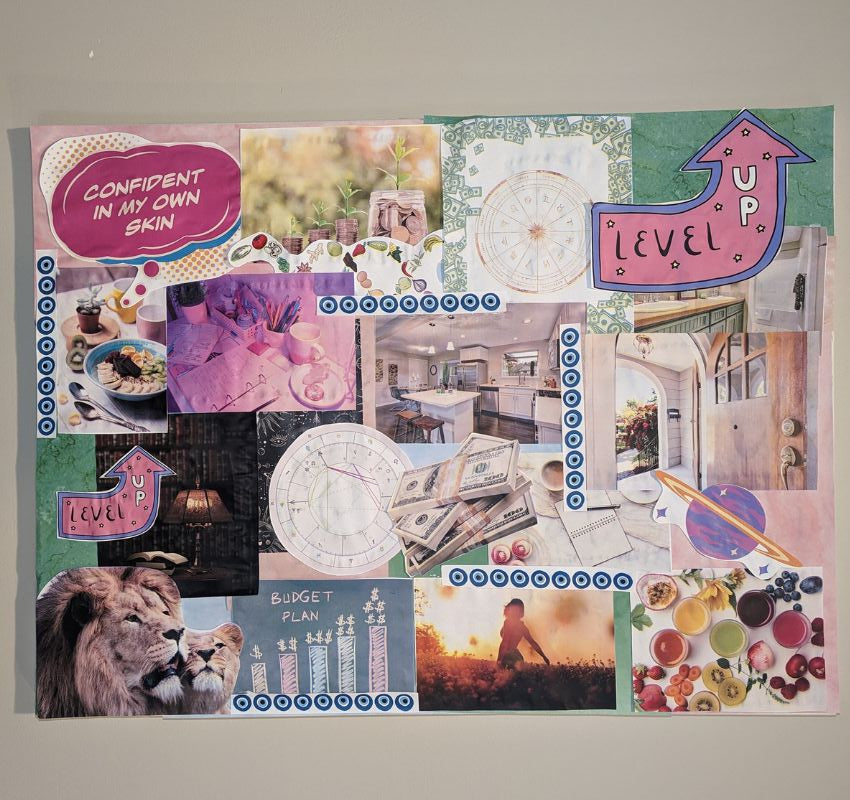
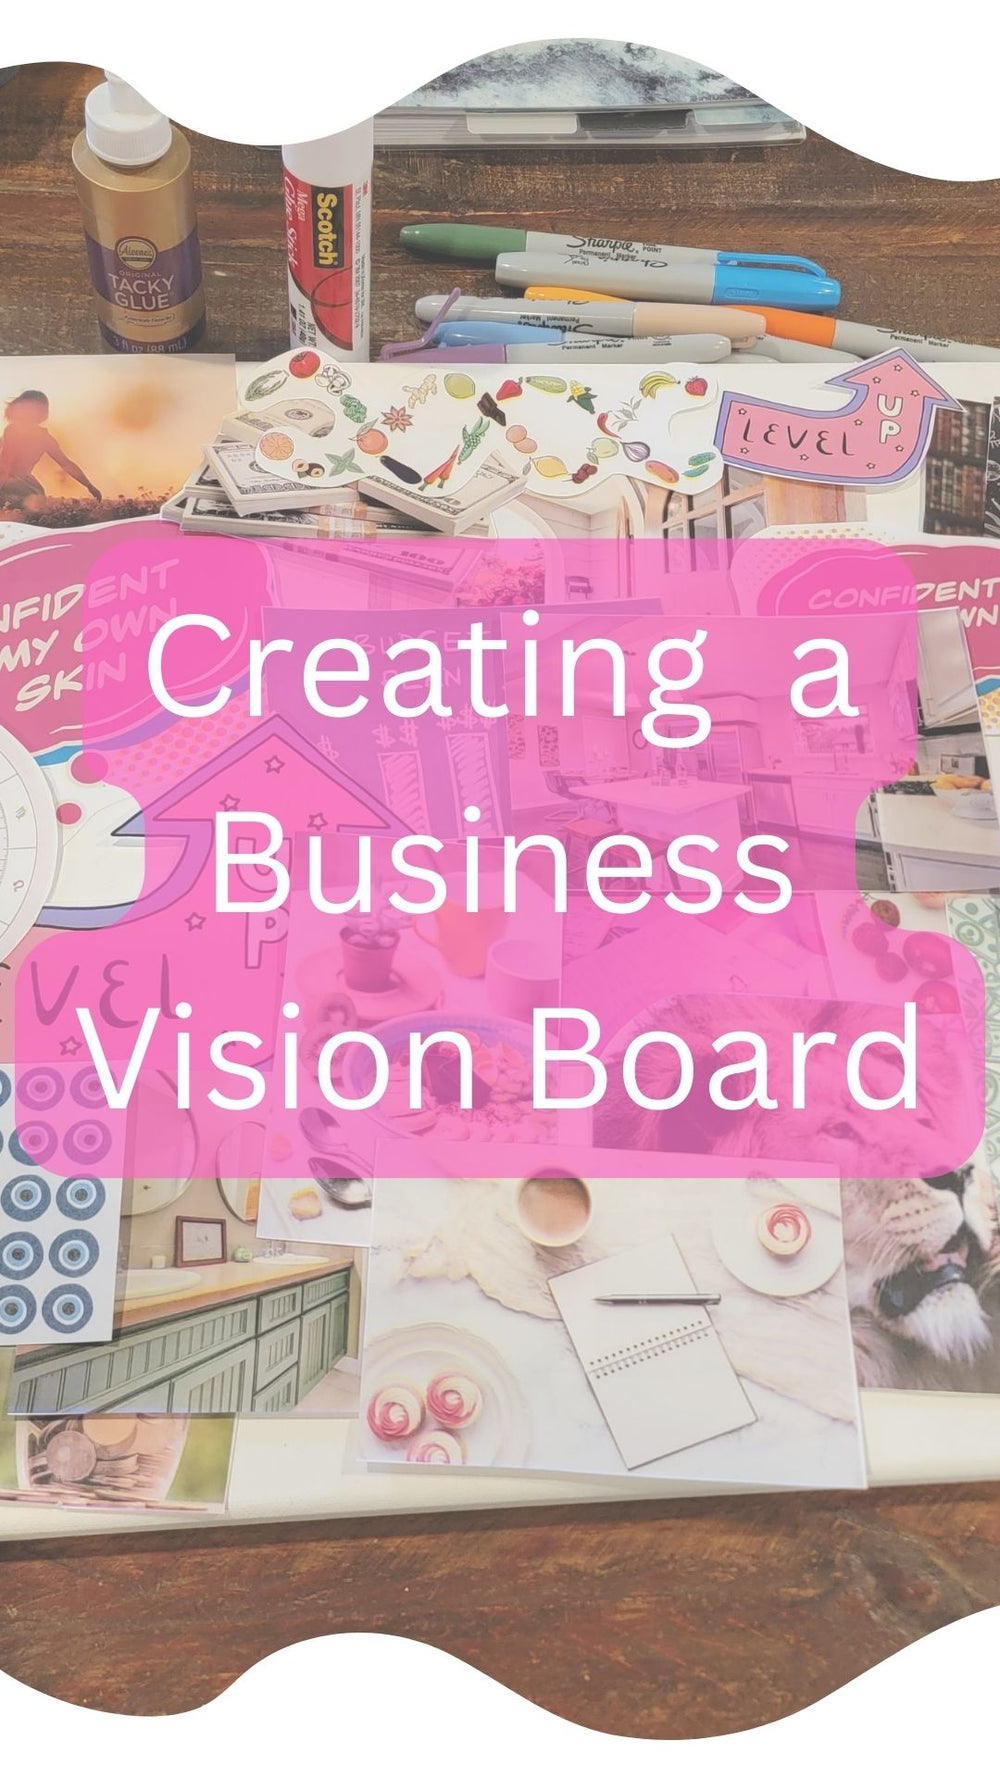
    It’s officially 2023 and this year we aren’t putting so much pressure on ourselves with New Year’s resolutions..but we are still accomplishing our goals!  Visualizing your goals is one of the best ways to bring good things into your life and this year we’re doing that with a business vision board.

    What is a vision board, you ask? Usually it's a collage of images, quotes, and affirmations that represent your goals and aspirations. It's a fun and creative way to set your intentions and manifest your desires, whether personally or professionally.

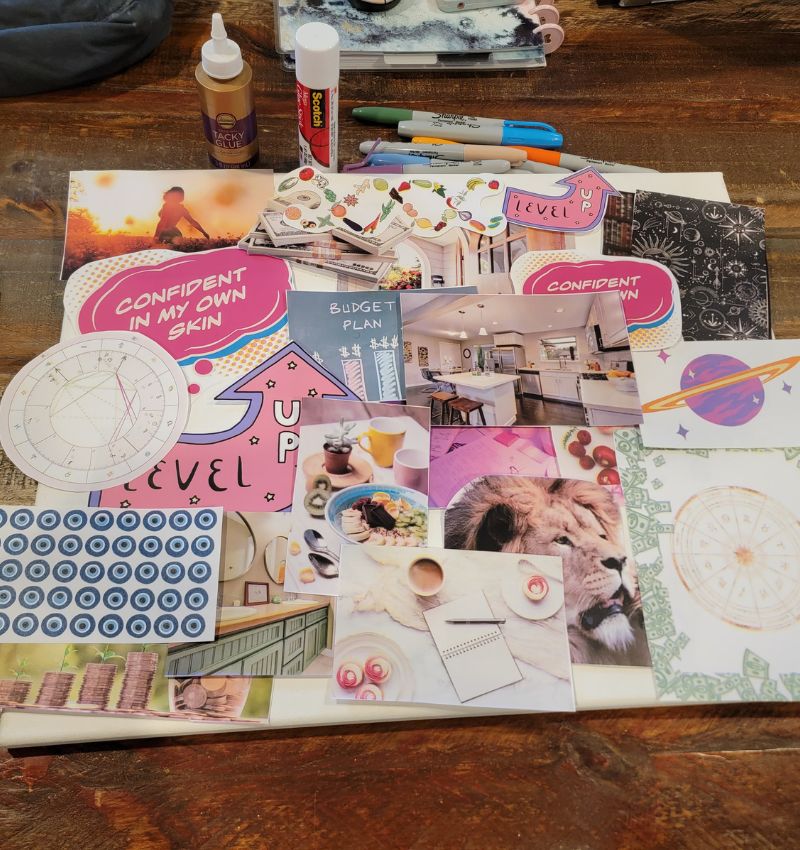
    With that said, here are the steps and methods I used to create my 2023 business vision board:

    1. Start by identifying the main area of your life that you want to focus on. For this specific board I chose my business and financial goals but you can create one for any area of your life. 

    2. Take the time to think about and decide exactly what you want to accomplish this year. Keep the list to about 10 things or less to keep your vision as precise and clear as possible. Once you’ve decided on what you’d like to achieve, visualize what that would actually look like when it shows up in your life. Keep in mind that the “how” is not the most important part. Try to detach from the idea of only getting these things a certain way and be open to the idea that these things can and will show up in ways that you don’t expect..and that’s okay.

    3. Gather materials: You'll need a large piece of paper or poster board, scissors, glue, and a selection of magazines or online images that represent your goals. You can also include quotes, affirmations, or other words of inspiration.

    4. Assemble your vision board: Look through your magazines and images and place them on your vision board however you’d like! You can create a collage or arrange the items in a grid or other pattern. Don’t forget the creativity! This is a great way to get in touch with yourself and your true desires for your business so make it fun and enjoy the process. 

    5. Reflect on your vision board: Take some time to reflect on your vision board and the goals it represents. How will achieving these goals make you feel?

    6. Display your vision board: Hang your vision board in a place where you'll see it every day, such as in your office or bedroom. This will help you stay focused and motivated as you work towards your goals.

    Remember, a vision board is a personal and dynamic tool that can change and evolve over time. You can add or remove items as your goals and priorities shift. The important thing is to create a vision board that inspires and motivates you! 

    When your vision board is complete, tag us @easyearringcards on all socials so we can see what you’ve created!

  • Tarot/Oracle Cards as Jewelry Cards

    Tarot/Oracle Jewelry Cards


    Within the past few years, people have been growing more grateful and close to their loved ones ,and with that, small and meaningful gifts and gestures have become more appreciated. With holidays and birthdays, and even trade shows going all year round, everyone is always looking for cute and personalized ways to package and display their creations. That’s why this idea is perfect for gifting and displaying your jewelry. Picking a (positive!) tarot or oracle card that reminds you of the person can be a great way to personalize a gift that inspires the person you’re giving it to. For trade shows, displaying your creations on tarot cards makes the shopping experience for a lot of buyers more exciting and creates a fun atmosphere at your booth! Take a look at how we styled these tarot jewelry cards and put your own personality into it! When you’re done, tag us on social media @easyearringcards to share your creation with us! 


  • Picture frame jewelry displays!

    Create a fun jewelry display with just a picture frame, cardstock, and our punches!
  • DIY bead organization while you work!

    This is an easy hack using the Foldover Hangtag/Display Punch to keep your beads organized and your workspace clutter free! 


  • BEAD & BUTTON FREE ADMISSION COUPON! JUNE 8-JUNE 10

    FOR FREE ADMISSION TO BEAD & BUTTON SHOW 2018 CLICK HERE!

    STOPBY BOOTH# 810...WE WOULD LOVE TO MEET YOU!

  • See what Monica creator of "Sparkle by Monica" did with our punches!

    We are posting a video from a very talented craft blogger. Monica of "Sparkle by Monica".  She recently ordered our punches. When we found out her talents. We asked if she wouldn't mind sharing what she created with us. Take a look... I think you will be inspired!

    She is also sponsoring a giveaway. check it out.

    https://sparklebymonica.com/jewelry-card-punches-tutorial-and-giveaway/

  • How to design your own earring cards with "Canva"


    Just received an email from a new customer asking how to make or design earring cards. The old tutorial we have on the site is, well "OLD".

    Time to  share a wonderful website that takes the mystery out of designing earring cards.

    A recent discovery - canva.com.  I am a self-taught graphic designer. When I taught myself, there were very few simple graphic design software programs available.

    Needless to say, I have wasted a couple of weeks of my life on creating ads, postcards, packaging, banners, website images etc,. Sadly, It was hit or miss at best.

    Enough about the trials and tribulations. Canva.com will be your best friend one day. Especially if you are trying to establish yourself as a professional.

    Please realize, with anything new there will be a learning curve. Don't think this will come natural to everyone. But it is worth a try. Didn't put exact measurements for this lesson. Just us wing it till it works. 

    We tried to make sure to include each step.

    Forgive me if it isn't precise.

    Just check out Canva and play around a bit. You don't have to create as many designs as I did.

    Do up a couple and see if it is worth it. Send us a picture of your designs.

    We will share them.


     Two methods of earring card design.

    Included :how to design one single card for business card printing and how to create a cardstock sheet of 12 cards.

    Go to Canva.com

    Step 1-

    Select "custom dimensions"

    Step-2

    SINGLE CARD DESIGN-FOR BUSINESS CARD PRINTERS.

    Choose 2 inch x 3.5 inch.

    (if you are using a printing company that wants a "bleed" just add 0.25 inch to this measurement. And remember to include the  "bleed border" when designing.)

    FOR PRINTING ON YOUR OWN CARDSTOCK WITH YOUR PRINTER.

    Custom measurement- 8 inch x 10.5 inches long.

    Scroll down layout for 4 blocks horizontal and 3 blocks vertical. This will give you a base template.

    Step 3-

    Select background, if desired. There a few free backgrounds as well as any color background you desire for free. Canva also has images for purchase. I don't think it is necessary for earring cards.


    Step 4-

    Select text. Write your business name and adjust size if necessary. This can be adjusted at any time. All elements can be clicked and dragged with your mouse. Double click on text to edit.

    Step 5-

    To add design elements select "elements". Or this is where you can add your own logo by selecting "upload".

    Step 6-

    Fun step. Scroll through the elements and see what intrigues you. All of the elements can be edited. You can change the color or crop the images. There is also a way to create levels of transparency. In this example, I changed the color and flipped the image upside down and dragged to the bottom of the earring card.

    CARDSTOCK OPTION-

    With the grid for cardstock, I had alot of fun creating several cards on the grid to see which looked best to me. ( I used frames, buttons,flowers, scrolls, crown & a monkey.

    This may be time consuming at first. It will be worth it in the end.  Imagine needing earring cards and just grabbing some cardstock and printing out what you need anytime!

    Step 7-

    Download to PDF for printing.

    For the single this is the file to submit to printing company.


    CARDSTOCK OPTION-

    Delete the grid before printing.

    *Also- Learn from my trial and error. The earring cards on the left side of the file, need to have the text and image moved over a little to account for the area the printer can't reach. Also the top text must be a little lower to account for the printer edge.*


    Step 8-

    Ready for Print. Print on copy paper until it looks good to you.

    Step 9-

    Cut the cards. They should be 2 inches across each and 3.5 inches long. Best way to cut is using a paper trimmer with precise measurements. You can use scissors but won't be as accurate as the trimmer. 


     My least favorites-

    My Favorites-

     What they look like with earring holes created by our punches.

    To create a professional style style photo.

    Just add a natural element like a shell, rock, twig or leaves.

  • Easy, Elegant Display for Craft Show, Wedding Favors, Shower Gift Idea.

    Here is an easy idea for any upcoming events that might require a party favor.
    I love this for a beach themed wedding. You can easily create key chains or tie pins for men.

Added to cart

c